Adding Folders and Form
In this article, we will be showing how to
Adding a Folder
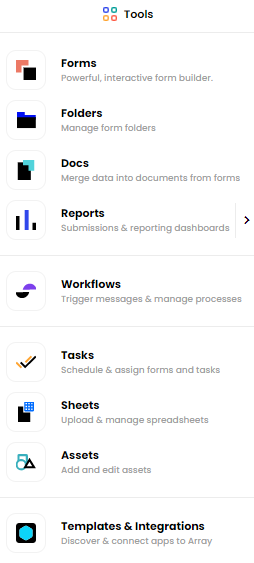
It's a good idea to start by adding a Folder. This is easy to do, start by clicking Folders in the 'Tools' dropdown menu, which can be found at the top right hand of the page, next to your account name

Then the 'add' button at the top right hand side of the page.
![]()
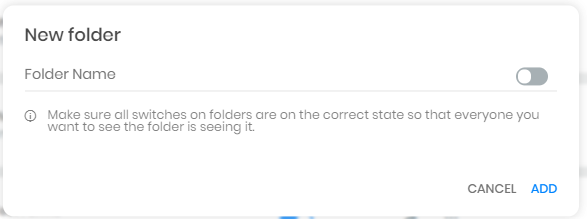
You will then be prompted to name the Folder. You should choose a name that will help you identify what sort of forms will be contained within the folder, such as Admin Forms or Sales Leads. At this point you can also make the switch live because no one can see the folder. This will save you from having to do it later on.

It's important to note that you can change all this information later if you need to. Finally you need to click save to complete the creation of your Folder.
To customise your folders, have a look at Folder Branding.
Adding a Form to a Folder
Now you have added a Folder you will see it has appeared on the list with other Folders. You now need to populate it with any necessary forms.
To do this, you should click anywhere on the Folder you just created. You will be directed to the Forms page, containing a reminder that you don't yet have any forms in the Folder.
To add a form click on the 'add' button at the top right of the page.
![]()
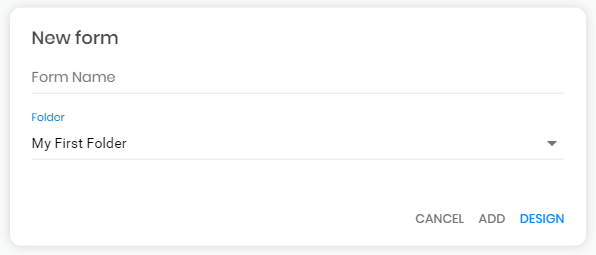
You will see on this page the folder you have just made has already been selected in the drop-down list, so all you need to do is give the form you are about to make a name, and click on Add Form.

If you click on design, you will see the form builder page on your screen. It's here that you will design the form you need. Take a look at Form Builder on how to build your forms.
Related Articles
Folders & Forms Information Bar
The information bar is a great tool that can be used to give instant information about either the folder of the form you are looking at. The information bar is a great tool that can be used to give instant information about either the folder of the ...Assets
You can use our assets to keep track of your company assets You can use our feature called Assets to keep a log of your company’s assets from tablets to vehicles. In this article we will be showing you - How to create an asset form - Where to find ...Teams
It allows you to control the level of access that individuals have, both to your information as well as the system as a whole. The permissions system available in Array has some impressive functionality. It allows you to control the level of access ...Users
Everyone who has access to the Array system is called a User. Everyone who has access to the Array system is called a User. The type of User they are depends on what permissions they have been granted, and/or what Team they are allocated to. You can ...Web Forms
The Array platform is split into two separate, inter-related sections: the admin dashboard and the Web Forms. The Array platform is split into two separate, inter-related sections: the admin dashboard and the Web Forms. In this article, we will ...