Teams
The permissions system available in Array has some impressive functionality. It allows you to control the level of access that individuals have, both to your information as well as the system as a whole. In order to segment users into groups according to their permission levels, you’ll need to use the Array Teams feature.
In addition to addressing the difference between the Array team Roles, this article also explains how to:
- create a new team
- add users to a team
- assign teams to folders
- remove users from a team
- delete a team
Roles
Your users can have any of the following roles which is selected when creating teams:
- Account admin has virtually all of the same permissions as the account owner. They can view, edit & share forms in all folders, as well as add users, review & edit reports and submissions and create & manage themes.
- Client Reports gives users access to our Report dashboard and the ability to view any submissions and any of their own submissions on forms.
- Data Entry Users are able to open existing forms and enter new information. This role is meant for field operators who are collecting data without reviewing its results.
- Field Manager has access to all the folders allocated to them but also have access to all submissions in that folder and can view and edit submissions,
- Form Editor is one of the few roles which gives the user the ability to edit & share forms in a folder. The role also gives access to the view & edit all reports and submissions, manage themes.
- Operator is someone who has access to folders and forms to submit but can also view and edit only their own submissions
- Own Reports Access gives the users the view of the reports and any of their own submissions.
- Reports Access users have the ability to see our Report dashboard with access to see all reports, all & their own responses and see the location of all the responses.
- Support user only have the access to our in app chat feature.
Here is a table to easily show what roles have what access:

Creating a New Team
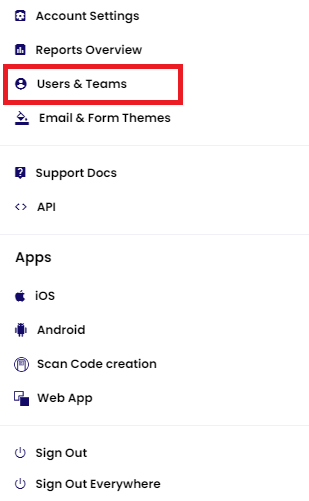
To start managing your teams, click on your profile in the top right hand corner of the page, next to your account name, and click on 'Users & Teams'

You then select Teams in the top navigation to get to see all your teams.

Array automatically creates four teams for you. However, let’s say that you have a new group of users who you expect to grow within your organization together and outgrow their current permission. In this instance, you may want to create a new team just for them. Let’s call this example team “Winter 2015 — New Hires.”
As with most Array pages, you’ll start by clicking the add button in the top right corner.
![]()
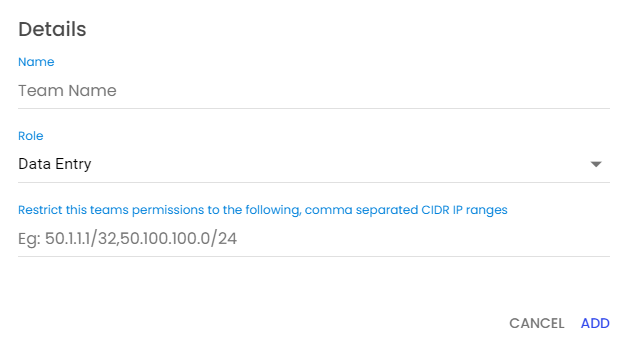
A popup box will appear asking you to enter a team name, select a permission class from the drop-down menu and if you wish to restrict this team to IP range. Enter the information and click 'Add'.

You’ll see your new team was created. If you’d like to rename a team, hover over the name and 'Rename' will appear.

Adding Users to a Team
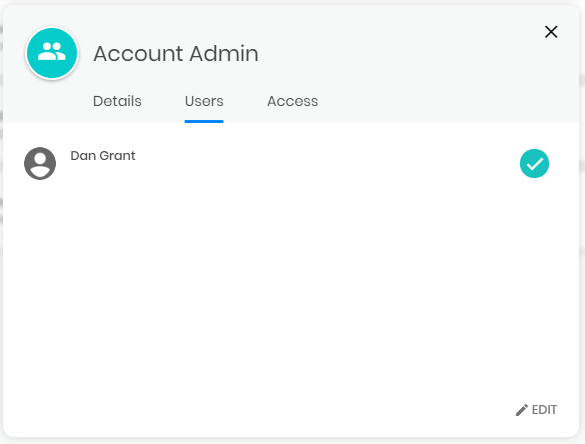
Now that you’ve got a new team, you’ll want to populate it with users, of course. To do so, click the Team bar that requires the new user to be added. This will open a pop-up that will show you information about the team you have selected. Within the pop-up, select Users tab and it will list all users on that team.

To add a new user, click edit in the bottom right of the pop-out,
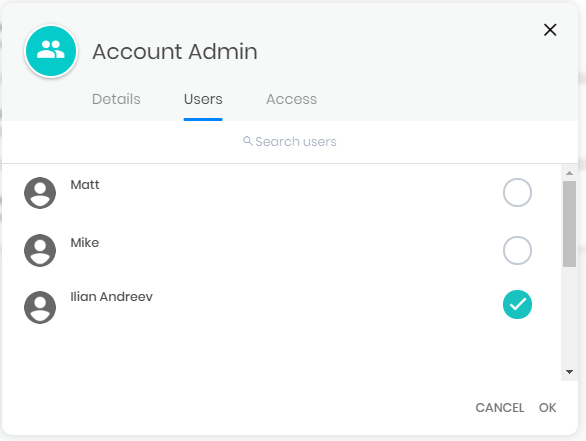
Check each user you’d like in the team and click the Ok button in the bottom right corner.

You can adjust the permission class from this menu and toggle the team status on and off. Be sure the status is in the 'On' permission if you’d like to apply it to your folders.
Assigning Teams to Folders
What’s the point of creating teams if you’re not going to assign them to folders? To start activating permission classes on specific groups of forms, click the Folders button in your left sidebar.
Then, click the plus button to the right of the folder bar or the share button. This will display a drop-down of both Users and Teams,

Search for the team you would like to add and select with a tick on the right and click Share. (Note that the Account Admin team does not appear here. This is because account admins automatically have access to all forms in a Array account.)
Removing Users From a Team
To remove a user from a team, open Users in the side navigation and select Teams in the top tab. This will display all teams you have set up already.
Open the Team where the user is that you would like to remove and go the Users Tab on the Pop-out and Click Edit in the Bottom Right.
You will be able to de-select the tick on the user you want to remove. Once you have unchecked the user, click Ok to save these changes.

You can also remove teams from all the folders and forms they have access to from the Access tab.
Deleting a Team
Likewise, it’s quite simple to delete a team entirely. When on the Manage Teams page, hover over the left-hand side of the team, check the box that appears you want to delete

Related Articles
Users
Everyone who has access to the Array system is called a User. Everyone who has access to the Array system is called a User. The type of User they are depends on what permissions they have been granted, and/or what Team they are allocated to. You can ...Folders & Forms Information Bar
The information bar is a great tool that can be used to give instant information about either the folder of the form you are looking at. The information bar is a great tool that can be used to give instant information about either the folder of the ...Assets
You can use our assets to keep track of your company assets You can use our feature called Assets to keep a log of your company’s assets from tablets to vehicles. In this article we will be showing you - How to create an asset form - Where to find ...Account Settings
Account management is a simple yet crucial part of Array security. Account management is a simple yet crucial part of Array security — especially for users with access to more than one account. Use the Account Settings page to change your password or ...