Tables on Docs
If your forms have tables on them, you can display them on a template with Docs and customize the table to the layout you would prefer.
In this article we'll showing you
- How to find and display a table on your template
- 2 examples of customized tables
How to display a table
When you download a template of your form that has a table on, it will display the markers in the middle of the template
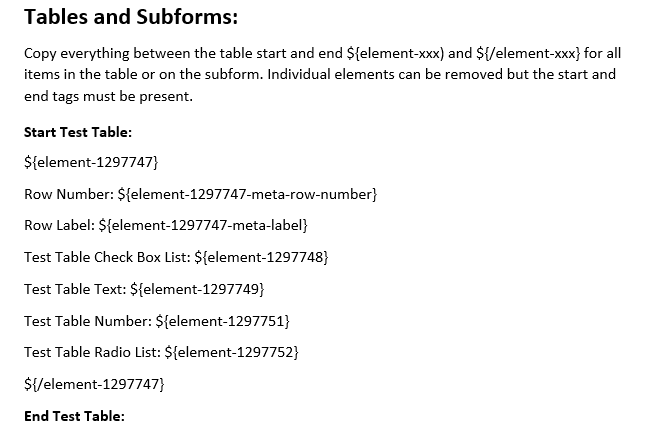
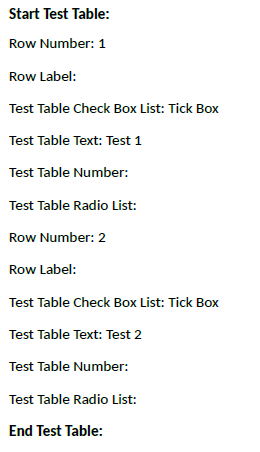
This table will list the rows in numbers per entry with all the labels
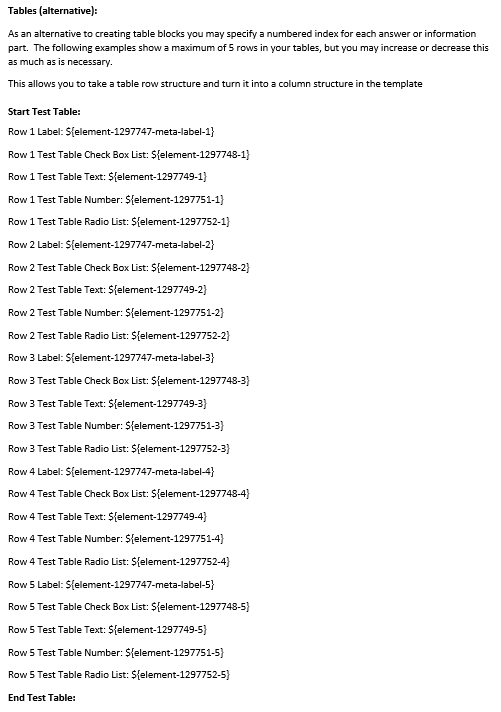
Alternatively, you can set a maximum number of rows on your table by finding the markers on the template under the first table markers
The tables will display the answers on your output format in a list. You can customize your table using the markers to display in the layout you prefer.
Example of a table
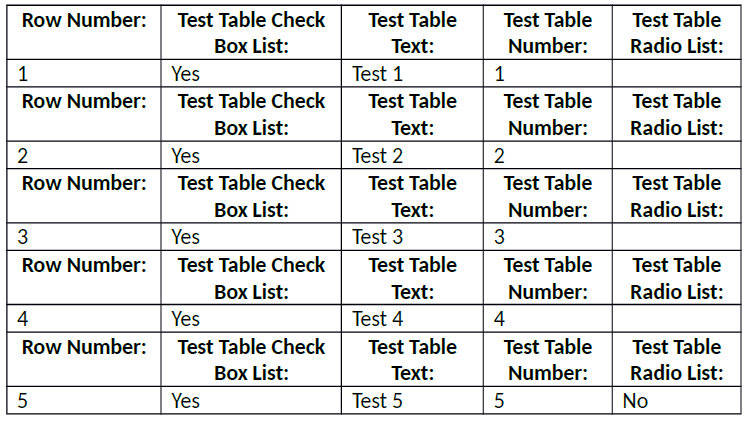
On this form, the table has a ‘Check Box List’ ‘Text’ ‘Number’ and ‘Radio List’ elements on it. The submission has 5 rows.
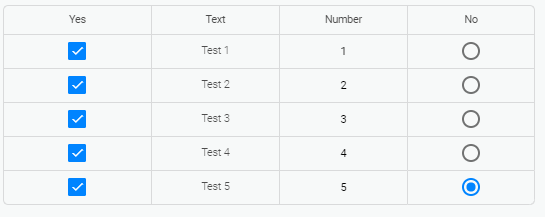
On the first table you can put a table on your template and copy the markers into the positions you would like them to display.

You need to make sure the table markers ${element-??????} and ${/element-??????} are around the row markers so your table displays and repeats on your download.

When you upload this template into Array, your table will download the submission in this way
Example of the alternative table
On the alternative table, you can set the rows up by taking each marker and putting them in the space you want them to display.
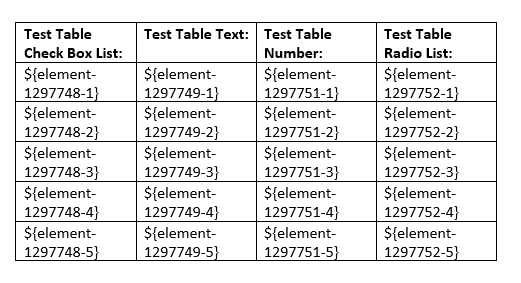
When you upload this template into Array, your table will now download the submission in this way

If you need more rows in your table, you'll need to add the number of your row to the end of the marker. The 'Test Table Check Box List' marker is ${element-1297748}, adding a number into this can show which row it will need to show from your submission.
If you want it from row 6, you'll need to put -6 into the marker
${element-1297748-6}
If you want it from row 20, you'll need to put -20 into the marker
Related Articles
Subforms on Docs
Any subform on your forms can be easily displayed on a Docs output. A subform submitted within your forms can be displayed on your Docs templates so you can download them your way. In this article we’ll be showing you - How to find and display ...Docs (Essential Account)
Docs allows users to customize the output of their submitted forms Docs allows users to customize the output of their submitted forms by downloading and upload a word document template. In this article, we’ll be showing you: Where to find Docs ...Docs (Pro Account)
Docs allows users to customize the output of their submitted forms Docs allows users to customize the output of their submitted forms by downloading and upload a word document template. In this article, we’ll be showing you: Where to find Docs How to ...Logic on Docs
Logic can be applied to Docs so it can show and hide elements on your templates. If your forms have logic on them, you can display this on your Docs so the logic is applied to the elements on your templates and can hide or show depending on the ...Images on Docs
Any images on your forms can be easily displayed on a Docs output. Images submitted within your forms can be displayed on your Docs templates so you can download them your way. In this article we’ll be showing you - How to find and display images on ...