Document Designer
Document Designers allows you to add to and edit your documents in Array and then link it to a newly generated or existing form, all in one place.
In this article, we’ll be showing you
- How to find the Document Designer
- The options you have in the designer
- Edit, copy or delete a document
The Document Designer
The document designer can be used to build new documents or edit existing one. You will be able to access the document designer by selecting several different options.
To see how to access the Doc Designer on a Pro Account click here
To see how to access the Doc Designer on a Essential Account click here
Designer options
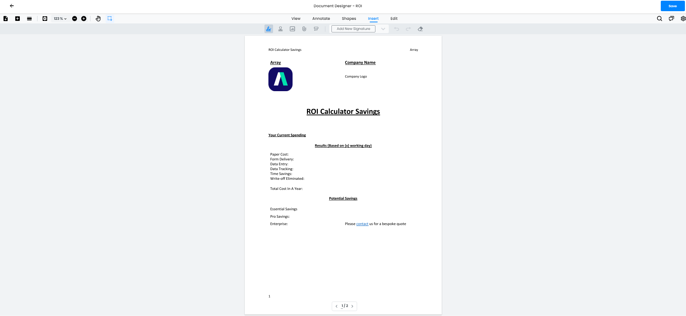
Once you have accessed the document designer from the above options, you will be able to see your document.

The toolbox has lots of options for you to add or edit your document with.

On the left hand side of the toolbox, you have the options to:
- Add New Page - Add a new page to the document
- Add Form Field - Add a form field from a linked form. Take a look at our Add Form Field support doc.
- Panel - Allows users to see a panel with a preview of all their pages in the document.
- View Controls - Allows users to customise the page transition, orientation and layout.
- Zoom Percentage - Select the zoom percentage of the document.
- Zoom In/Out - Select to zoom in or zoom out of your document.
- Pan - Allows users to scroll through the document
- Select - Allows users to select a group of elements on the document by dragging a box around them.

On the right hand side of the toolbox, you have the options for
- Menu
-
-
- Full Screen - Allows users to view the document designer in full screen
- Download - Allows users to download the latest version of the document into a PDF.
- Print - Allows users to print the document.
-
- Comments - Allows the user to see all the notes attached to the document.
- Search - Allows the user to search the whole document. This can be a word or a phase.

The middle of the toolbox has lots of options to add and edit your document. You have the options to
- View - Allows users to see the document without a toolbar
- Annotate - This section allows users to make notes on the document. The user can underline, highlight, strikeout current text or add notes, free text or add free hand writing into the document. The color and opacity of your chosen action can be changed in the section after the actions.

- Shapes - This section allows users to add several different shapes to the document. Lines can also be added through this section. The color and opacity of your chosen action can be changed in the section after the actions.

- Insert - This section allows users to add special elements to the document such as signatures, rubber stamps, stamps, links and callouts.

- Edit - Allows users to enter an editing mode to edit the elements on the document.

All of the middle options have ‘Undo’ ‘Redo’ and ‘Eraser’ buttons.

Once you have made all the changes to your document, click ‘Save’ in the top right hand corner.

Editing, Copying or Deleting your document
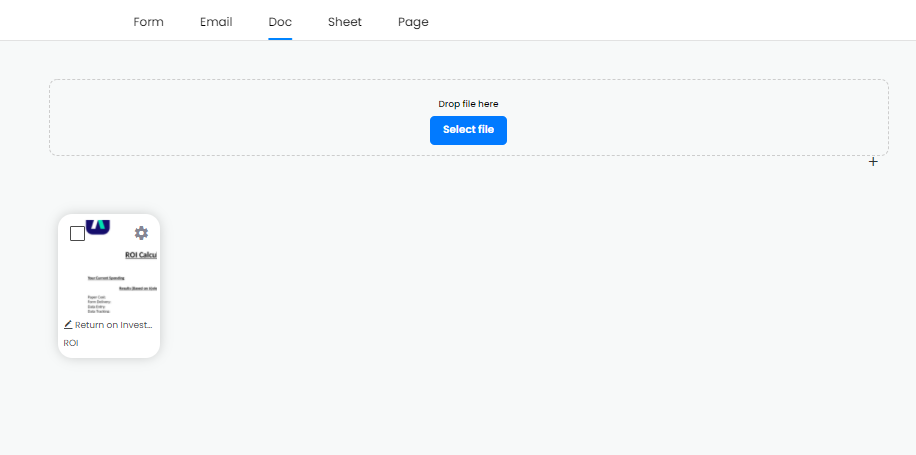
You are able to access the document designer to make changes to your document at any point. To make a change, you will need to find the document in the correct folder in the doc section.
Once you have found the document, click on the doc and it will load up the document designer so you can make your changes.

Once you have made your changes, click on the ‘Save’ button in the top right corner.

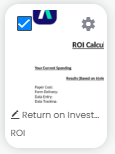
If you need to copy or delete your document. Click on the tick box on your document.

'Delete' and 'Copy' button will appear at the bottom of the page.

Related Articles
Add Form Fields
Customise documents with form fields within our document designer. Add form fields allows users to customise documents with form fields within our document designer. This will result in users being about to download submissions straight into there ...Docs (Pro Account)
Docs allows users to customize the output of their submitted forms Docs allows users to customize the output of their submitted forms by downloading and upload a word document template. In this article, we’ll be showing you: Where to find Docs How to ...Docs (Essential Account)
Docs allows users to customize the output of their submitted forms Docs allows users to customize the output of their submitted forms by downloading and upload a word document template. In this article, we’ll be showing you: Where to find Docs ...Functions on Docs
Functions used on your forms can be easily added to your doc templates to show the results. Functions submitted within your forms can be displayed on your Docs templates so you can download them your way. In this article, we will be showing you: - ...