Add Form Fields
Add form fields allows users to customise documents with form fields within our document designer. This will result in users being about to download submissions straight into there customised document.
In this article, we’ll be showing you
- How to find Add form fields.
- How to add forms fields to your document.
- Draw as templated overlay instead of form field tick box
- Adding a Check Box List or Radio List fields.
- Form Editing mode
Finding Add form fields
Add form fields is a feature within our document designer. Take a look at our support doc on how to get to our Document Designer and link a form to a document.
Once you are on the Document Designer, click on ‘Add form fields’ in the top left hand corner
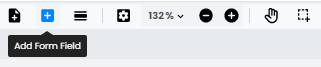
Once you click this button, a pop up window will appear in the middle of the screen.
Add form fields to your document
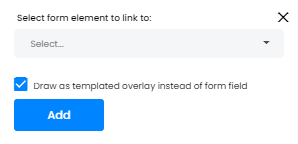
Now you have found ‘Add form field’, the pop up window has a drop down of all the elements within your linked form.
To add a field to your document, click the drop down to get it to display
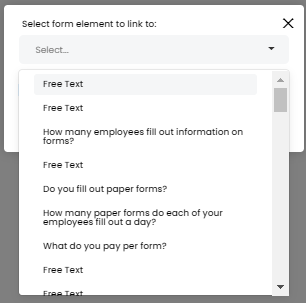
The dropdown will display all the fields that are allowed to be entered into the document. Fields like tables and subforms will not appear in the list.
Find and click the field in the drop down you wish to add to your document.
You have the option to ‘Draw as templated overlay instead of form field’. See below for further information on this.
Click on ‘Add’ at the bottom of the pop up window.

Once you have clicked on ‘Add’, your form field marker will appear in the middle of the document.

You are now have several options on this field which can be found in a toolbox under the field
- Comment – Allows you to add a comment to the field.
- Style – Allows you to change the color, size and opacity of the text, stroke and fill of the field.
- Delete – Allows you to delete the field.
- Link to URL or Page – allows you to add a URL or link to a page in a pop up window.
- Move to another page – Allows you to move the field onto another page in a pop window.
You are also able to move the field by hovering over the field until the arrows icon appears. Then you are able to drag the field into the correct place in the document.
Once you are happy with your fields, click the ‘Save’ button in the top right hand corner.

Draw as templated overlay instead of form field tick box
In the pop up window of ‘Add form fields’ you have the tick box for ‘Draw as templated overlay instead of form field’
If the box is ticked, the added form field will present the field marker within the customisable field as a simple PDF drawing.
Once you have customised the field this will remain the same after saving.
If the box is untick, the added form field will present the same way as if you had ticked the box, however once you save the document, the field will be changed into a native PDF field. The field markers will not be displayed but are still linked to the form field.

This will lock the field into place and will be unable to move unless you enter the Form Editing mode.
Check Box List or Radio List fields
As Check Box List and Radio List fields tend to have several answer for the users to fill in, when added to the document, these answers will available to add into your document as well as a tick box.
When you select a check box list or radio list field in the ‘Add form field’ dropdown, it will give a field for the answer and a field for the connected tick box.
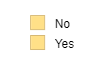
In this example, we have a radio list box with the answers of ‘Yes’ or ‘No’ then their connected tick box to the left of them.
These fields have the same options as other fields so you are able to move and customise them in the same way.
Once saved, a Check Box List or Radio List field will lock in place. You will need to enter the Form Editing mode to move them.
Form Editing Mode
Some fields will lock in place upon saving the document, however you may need to move them. To do this you will need to enter into the Form Editing Mode.
To get to the Form Editing Mode, click on ‘Edit’ in the top toolbar

Form Editing Mode is the first icon
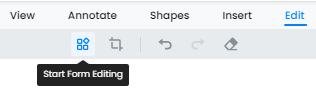
Click on the icon and you will enter Form Editing Mode
Any native PDF fields such as Check Box Lists and Radio List will now will able to be moved or deleted.
Click on the field you wish to move or delete
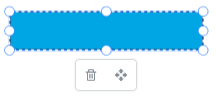
You can either drag the field to the correct place with you mouse, chose to delete the field or move to another page in the menu.
All simple form fields will not appear in the Form Editing Mode.
Once you have made all your changes, click on ‘Exit Form Editing Mode’ button at the top of the page.
Related Articles
Docs (Pro Account)
Docs allows users to customize the output of their submitted forms Docs allows users to customize the output of their submitted forms by downloading and upload a word document template. In this article, we’ll be showing you: Where to find Docs How to ...Document Designer
Document Designers allows you to make changes to your documents in Array. Document Designers allows you to add to and edit your documents in Array and then link it to a newly generated or existing form, all in one place. In this article, we’ll be ...Docs (Essential Account)
Docs allows users to customize the output of their submitted forms Docs allows users to customize the output of their submitted forms by downloading and upload a word document template. In this article, we’ll be showing you: Where to find Docs ...Tables on Docs
Tables can be easily displayed and customized on your templates in Docs If your forms have tables on them, you can display them on a template with Docs and customize the table to the layout you would prefer. In this article we'll showing you How to ...Images on Docs
Any images on your forms can be easily displayed on a Docs output. Images submitted within your forms can be displayed on your Docs templates so you can download them your way. In this article we’ll be showing you - How to find and display images on ...